
December 14, 2005
To everyone that's about to buy rivet tape, here's the only thing I'll say. See that piece of Scotch Magic Tape there?
That one piece did that whole skin. I used two pieces on the other skin. Just something to think about before you shell out $7.00 for a roll of tape...

Here's my back rivetting setup. The funny combination of foam and wood is just to get everything to the right height.

Two down, lots to go...

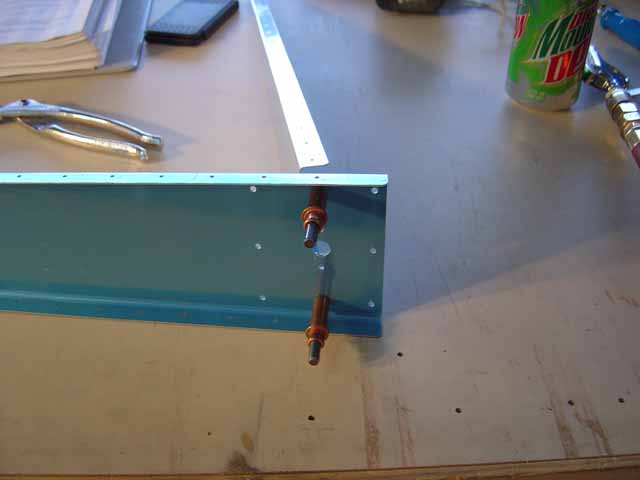
This is called back rivetting because you drive the shop head into a back rivetting plate instead of driving the manufactured head into a bucking bar. You tape all the rivets in so they don't fall out, lay the stiffener (or whatever) on the line of rivets, and then...

Drive them with this special back rivet set.

The white thing is a spring loaded sleeve that keeps the work tighlty together as you rivet.
This is the trailing edge. There's a note that says to make sure this rivet is fully set. What he should say is make sure it's squashed. It'll interfere with the rivet on the other side if it's even a little too high.

Finished back rivetting, and on to assembling the rudder frame.

Make the shim out of this material. it's not clear from the plans what you make it out of. I didn't drill any of the holes yet, though.

Really easy way to cut this without using snips (that can deform the material a bit), is to measure it out and score it with a utility knife a few times.

Then just put it on the edge of a table and it'll snap right off, nice and clean.

This is the rudder horn. It will need to be rounded before it'll fit into the rib flange.

Like that :)

Ah...the shim. It's a little confusing how all this goes together, but the shim is just there because the rudder horn is laying inside the rib flange. You need to shim the lower part of the horn so everything lays nice and flat.

Then I installed the hinge plate doublers. They are on the proper side of the flanges. Upper two go on the inside while the bottom one goes on the outside. Then I match drilled the whole shebang.

The tip rib is pretty curved right out of the box. Serious fluting needed here. Also, the front flange on this and the counterbalance rib need a little love to get them to match the counterbalance skin properly.

Now you just start adding more and more pieces until it looks like a rudder. Right skin clecoed on here.

Left skin's on.

Here's the rudder horn brace. Do NOT trim this the way you trim everything else. If you trim to the center of the holes you may end up short and not maintain your edgedistance. I started conservatively and trimmed to the outside of the line.

In my particular case, it was an absolutely perfect fit the first time out.

Here's a shot of the inside. I eventually smoothed out the edges, etc and that took a little more material off as well. As you can see, though, even trimming it the way I did left some gap between the rib and the doubler. There's no problem with a gap as it doesn't need to fit tight, but it just shows that there's no reason to trim anymore than this, and least as a first cut.

Fabricate the lower tip attach strips out the same material as the shim stock.

Not sure what I was trying to show here, but pay attention as it's probably important!
Update 12/22/05: I remember now. There was a VERY nasty scratch from the factory on this thing. I just hit it with the die grinder with a maroon wheel and then buffed it out with the VFN wheel. You'd never know it was there

Here's how I aligned this thing. Keep the back and the front of the lower rib clecoed in. You can see it on the right hand side pushing the strip out of the way. After getting the strip aligned (just eyeballed it), up against the rib nice and tight, and clamped I removed the cleco and finished clamping the trailing edge down. This makes sure the rib and skin maintain their alignment during clamping.

At this point, the entire rudder is drilled and ready for edge finishing, deburring, dimpling and priming.